Friday, 21 February 2014

Bicycle flashlight #4 - Flashlight casing

Ok... we have all the electric part, the flashlight works, but we need a way to fix it on the bicycle.
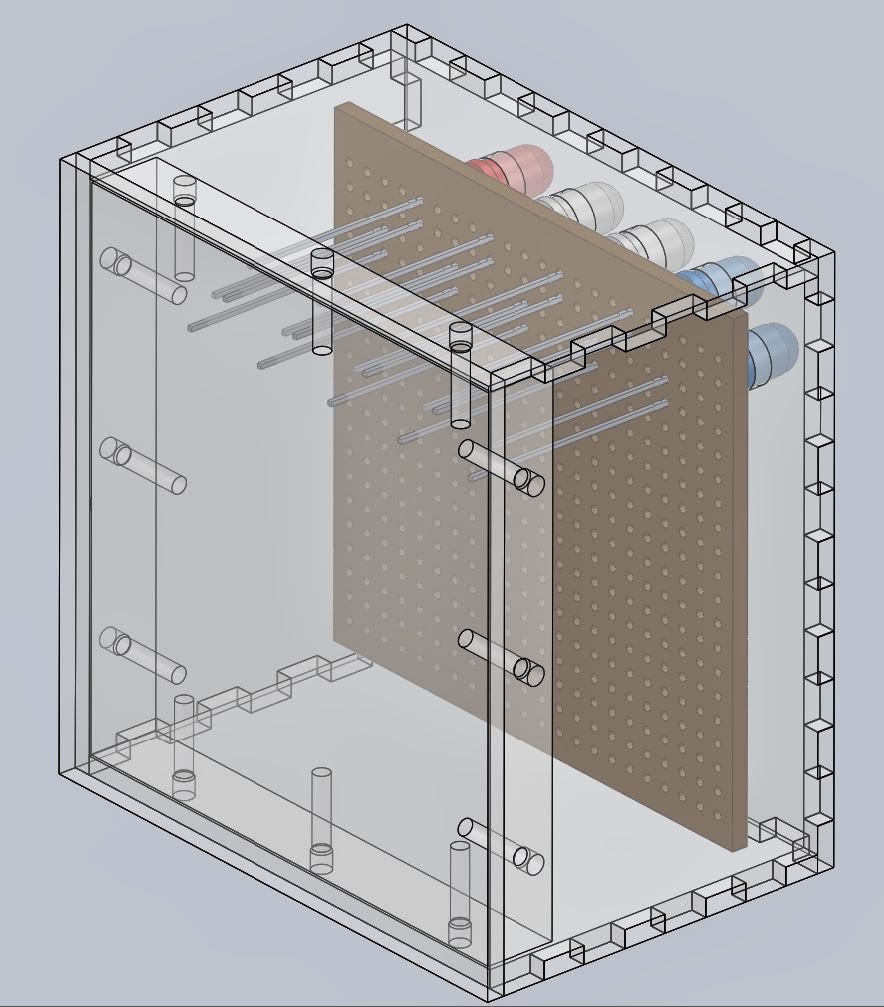
Initially I wanted to make a lether paunch but later I changed my mind to a lasercut plexi housing.
The design was made in a 3D CAD software.
At first, I modeled the board with the leds on it and built around it the housing.
Flashlight front

Flashlight back

Thursday, 13 February 2014

Bicycle flashlight #3 - From prototype to final product

In this article I'll show you the moving from prototype to final product.
I started by removing the leds from the breadboard and assembling them to the prototyping board.
Be carefull about the layout of the leds, not to mix the colors.
LED layout
After every additional led was assembled to the board, it's (-) legs were soldered together, so that at the end we would have a GND rail.
LEDs soldered toogether

Wednesday, 12 February 2014

Bicycle flashlight #2 - Software

In the second phase of the bicycle flashlight project I'll describe the software loaded on the micro controller.
The program is writen and compiled in microPascal, and the machine code is loaded on the controller with AVRDude.
All the text small font size and dotted, is part of the code and part of one single program file in the sequence they appear in this article.

1) The first part of the program is a description, containing title, revision, author, date, etc.
  • // Project Bike_lamp, revision 01, Gaal Alexandru, 09.01.2014
  • // Bike flashlight project with 7 ligthing modes
  • // Mode 1: Police light
  • // Mode 2: Blinking red light
  • // Mode 3: Constant red light
  • // Mode 4: Blinking white light
  • // Mode 5: Constant white light
  • // Mode 6: Blinking blue light
  • // Mode 7: Constant blue light
All the text that is after the "//" characters are considered comments.

Tuesday, 21 January 2014

Bicycle flashlight #1 - Intro & prototype on breadboard

A buddy of mine, who is a big bycicle enthusiast, has his birthday coming up... so I decided to build a custom flashlight for his fixed gear bike.
I'll divide the project into four phases.
In the first part I'm going to introduce you to the project, and describe the prototype circuit on a breadboard.

For the electric part you need the following components:
- ATmega 168 or similar micro controller in DIP package
- Three red, three white and three blue ultra bright leds
- At least 10x10 cm prototyping board with standard 2.54 mm hole distance
- Nine 470 ohm resistors
- 5V regulator 7805
- Two 100 micro farad capacitors
- Two 100 nano farad capacitors
- Small toggle switch
- Small normal open switch
- Battery holder for four AAA batteries
- Some thin wires
- Atmel programming interface (or similar)
- Silicon glue

It also helps if you have a breadboard and some jumper wires.
I recommend before trying to understand the circuit that I will describe, to take a look how a breadboard works, how to connections are made in it. You can take a look at the Wikipedia article: "http://en.wikipedia.org/wiki/Breadboard".
Tool you need for the first part:
- cutting pliers
- bent nose pliers
- soldering iron & solder