The layout of the camera I intend to be as compact as possible, without exceeding a creditcard size (the size of the Raspberry Pi) and all in one enclosure.
However it is possible that during the project I will chose a two module design, having the "brain" + controls, batery and display in one module and the camera + sensors in a different module, conected by a cord.
In this post I'll describe the initial one enclosure layout, that I target to have.
In the front (bottom of the Raspberry Pi) we will have the camera module, the GPS module, the temperature and pressure sensor and a battery pack.

In the back (top of the Raspberry Pi) we will have a 16x2 monochrome LCD display and three buttons:
- Go left buttom: will make the "Selection Left" current
- Enter button: will confirm or execute "Current Selection"
- Go right button: will make the "Select Right" current
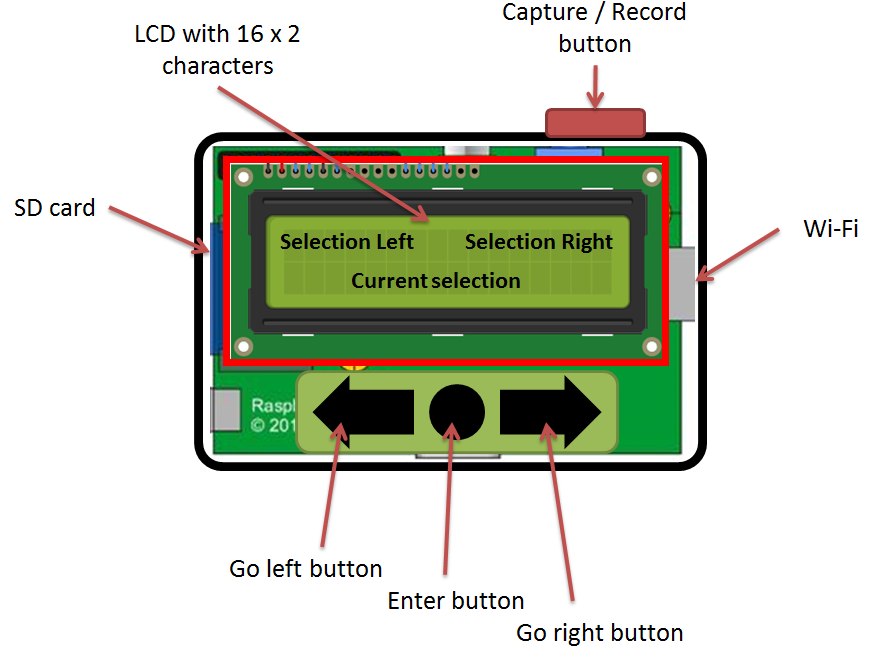
On the sides we'll have the SD card acces slot, the Capture / Record button and the Wi-Fi module.
No comments:
Post a Comment